
 Support FPE

How to Create Triggers in Blender for Godot
A trigger is invisible in the finished game, but it belongs to the art of the level: exactly where the music changes, the greenhouse wakes up, or a doorway begins its little performance. Author that space where you can see it—in Blender.
You will make: a clearly named Blender volume that reacts when
the intended participant enters or exits and dispatches a reusable Scene Event.
Shape the gameplay space in Blender
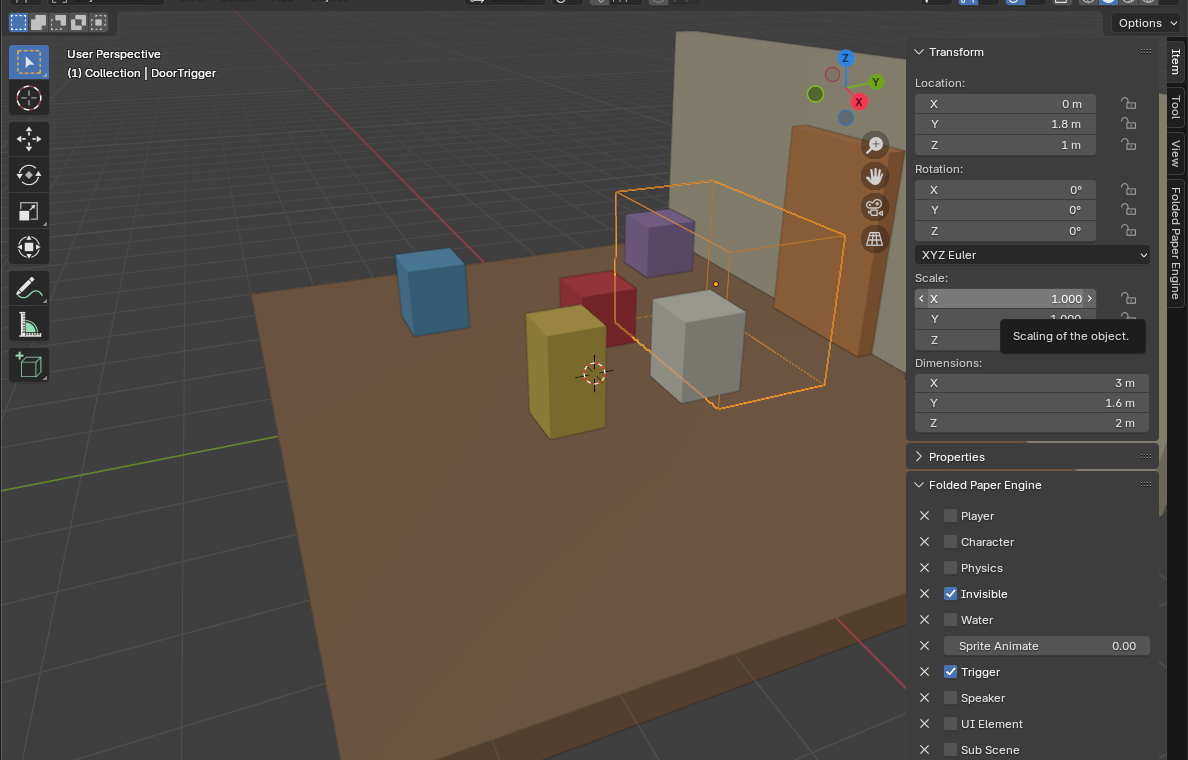
- Add a cube where the event should happen and scale it to cover the useful area. A doorway trigger should span the opening; a music region may cover a room.
- Apply transforms so the exported size is predictable.
-
Give it a descriptive name such as
GreenhouseEntryTrigger. - Open Item → Folded Paper Engine and check Trigger.
- Also check Invisible when the cube is only a gameplay volume and should not be drawn in Godot. Leave it visible only when the object is meant to be seen as well as used as a trigger.
Choose who can activate it
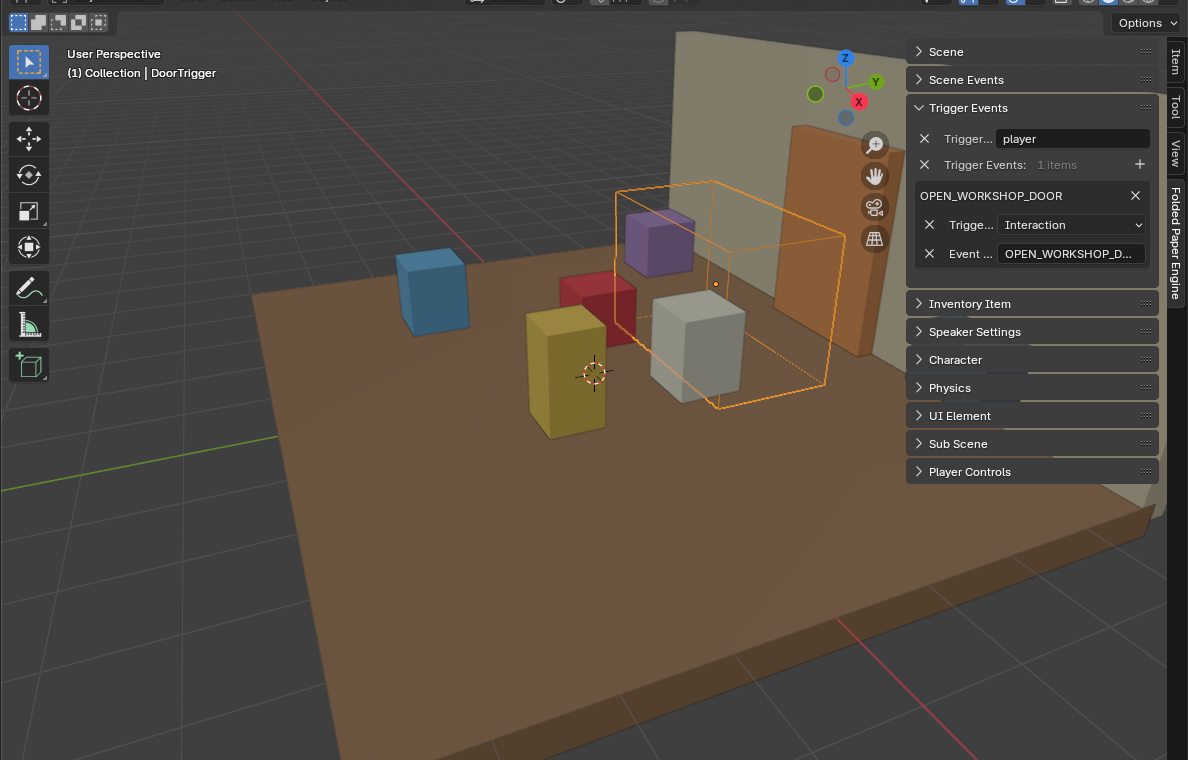
Open Trigger Events. Use Trigger Groups to limit participants instead of accepting every physics body in the scene. Pick a stable gameplay group used by the player or intended character. This keeps a rolling crate from starting dialogue or changing the level.
Dispatch meaning, not implementation
- Add a trigger event for entering or exiting, according to the problem you are solving.
-
Choose a stable Scene Event name such as
ENTERED_GREENHOUSE,LEFT_COTTAGE, orSTART_TEA_DIALOGUE. - In the Scene Events panel, create the matching event and add the commands it should perform.
- Start with one visible result—play an animation or speaker—before building a long command chain.
Test it like a level designer
- Walk through from every direction and check the activation boundary.
- Test the exit as well as the entrance when both matter.
- Decide whether repeat activation is delightful, harmless, or a bug.
- Keep the trigger mesh simple. The player cannot appreciate a complicated invisible collider.